How to add custom fonts to your biopages.
Web fonts are one of the quickest ways to make your page look distinctive, modern and less traditional or “classic”.
First, we can add some sweet fonts, from Google Web Fonts. The intimidating bit is choosing fonts that look nice together. Luckily, there are plenty of suggestions around the web: we’re going to use one of DesignShack’s suggested free Google Fonts pairings. Our fonts are Corben (for headings) and Nobile (for body copy).
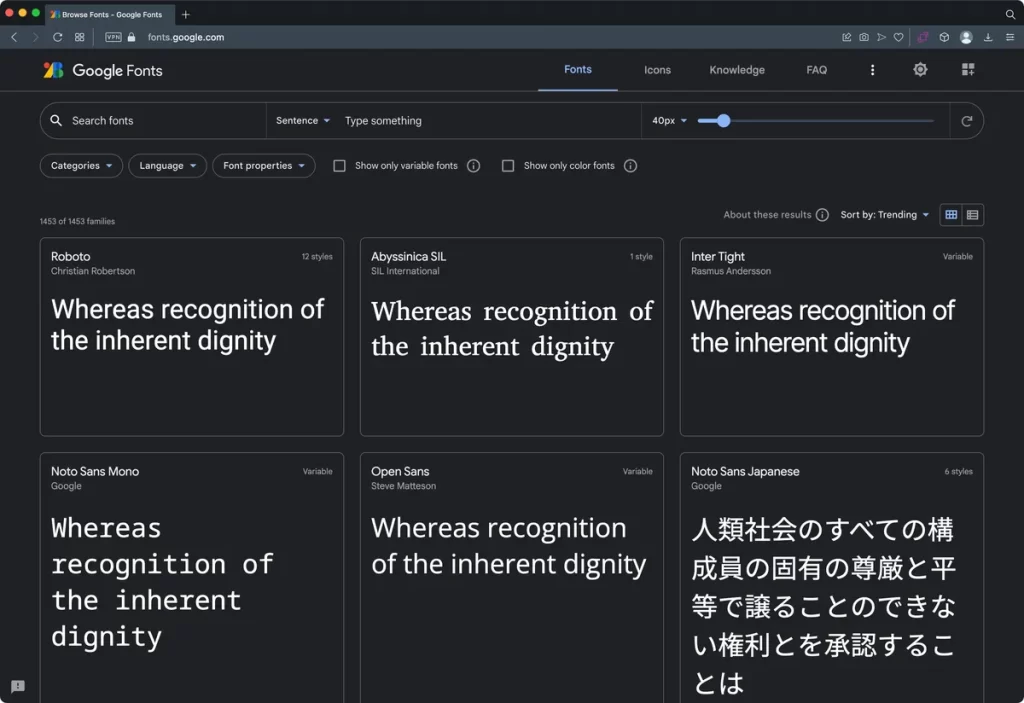
Steps to adding custom CSS
Choosing type
When you have some text, how can you choose a typeface? Many people—professional designers included—go through an app’s font menu until we find one we like. But the aim of this module is to show that there are many considerations that can improve our type choices. By setting some useful constraints to aid our type selection, we can also develop a critical eye for analyzing type along the way.
The typeface suits the purpose of the project.
It might sound obvious to say that our choice of typeface should suit the purpose of our project, but there are plenty of examples in the wild of designers using typefaces that just don’t work.
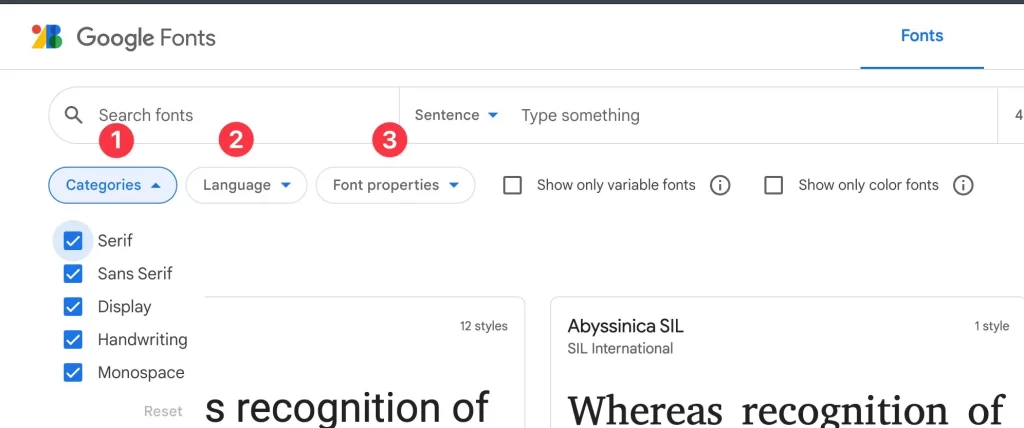
Step 1: Select a font
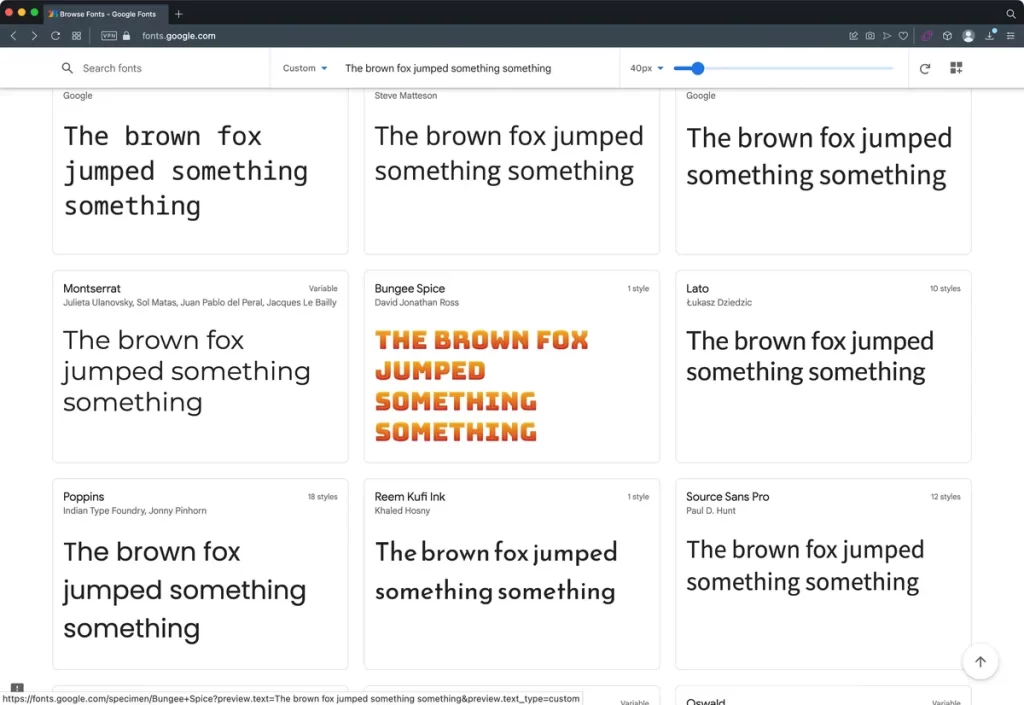
Step 2: Select font style(s)
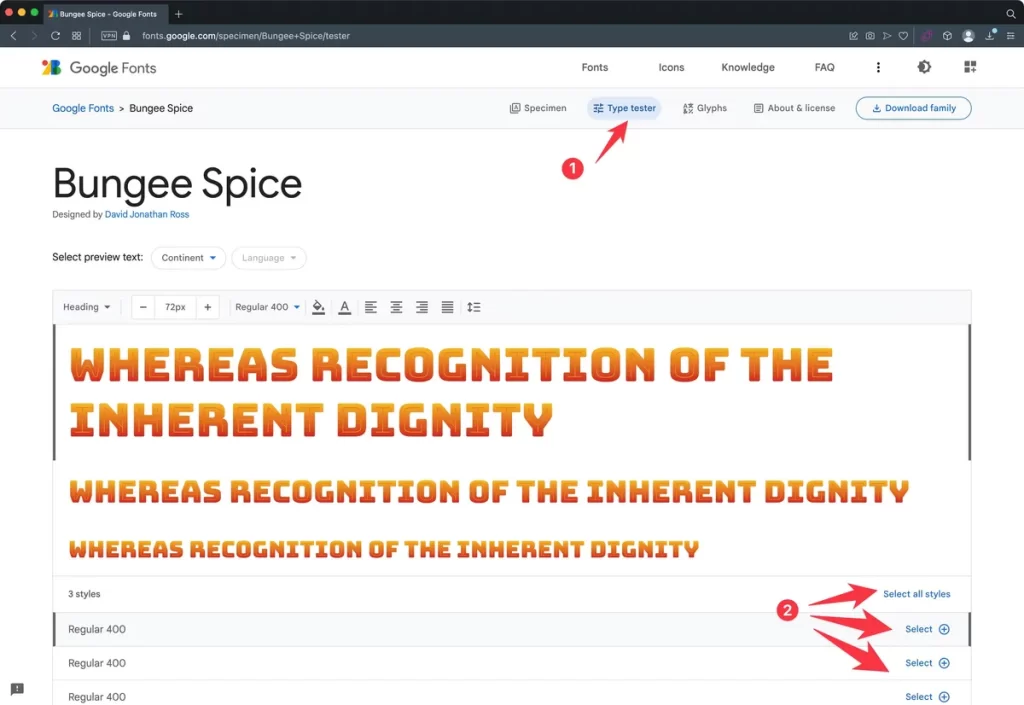
- Click on Type tester.
- Select font style you wish to use.
Step 3: Select font style(s)
Once you’ve selected the style you wish to use clic on the upper right icon that reads “View selected families. A side bar will open to reveal more options.
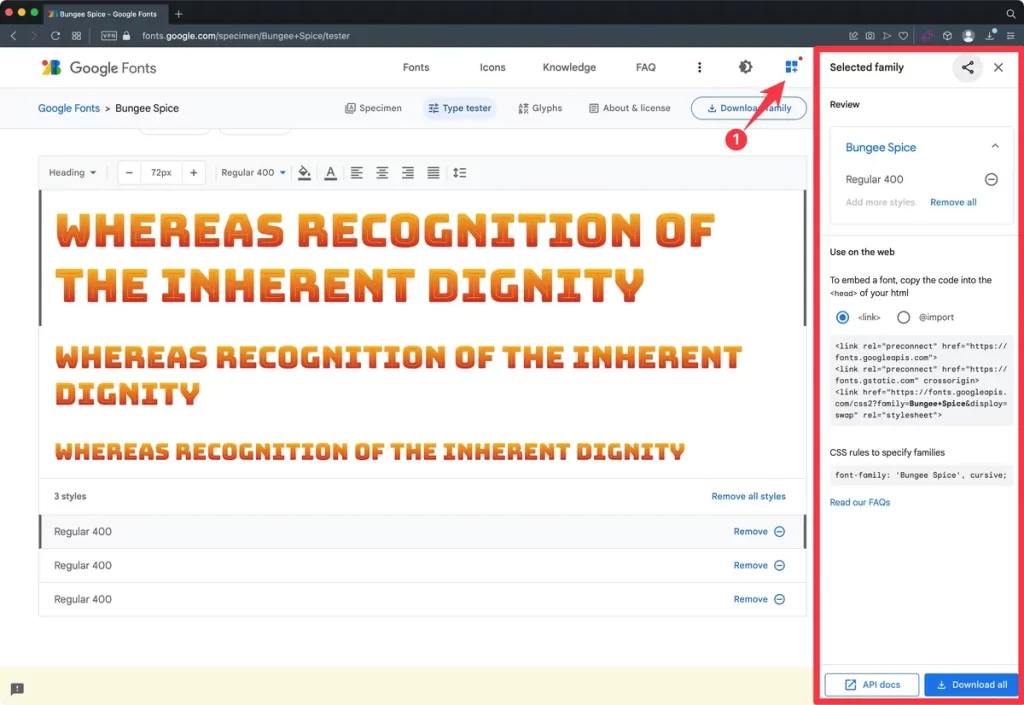
Step 3: Copy font details
You will need to do two things:
- Click on “@import” option on the panel that reads “Use on the web”.
- Select and copy everything between “<style>” and “</style>”.
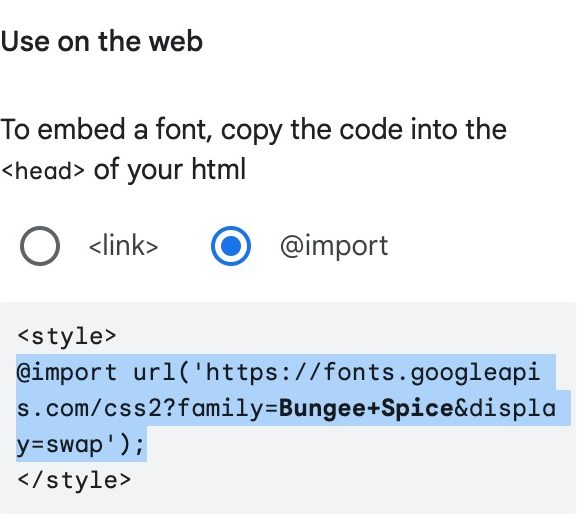
3. Paste this code into the “Custom CSS” box located in the “Settings” tab of your Bio page.
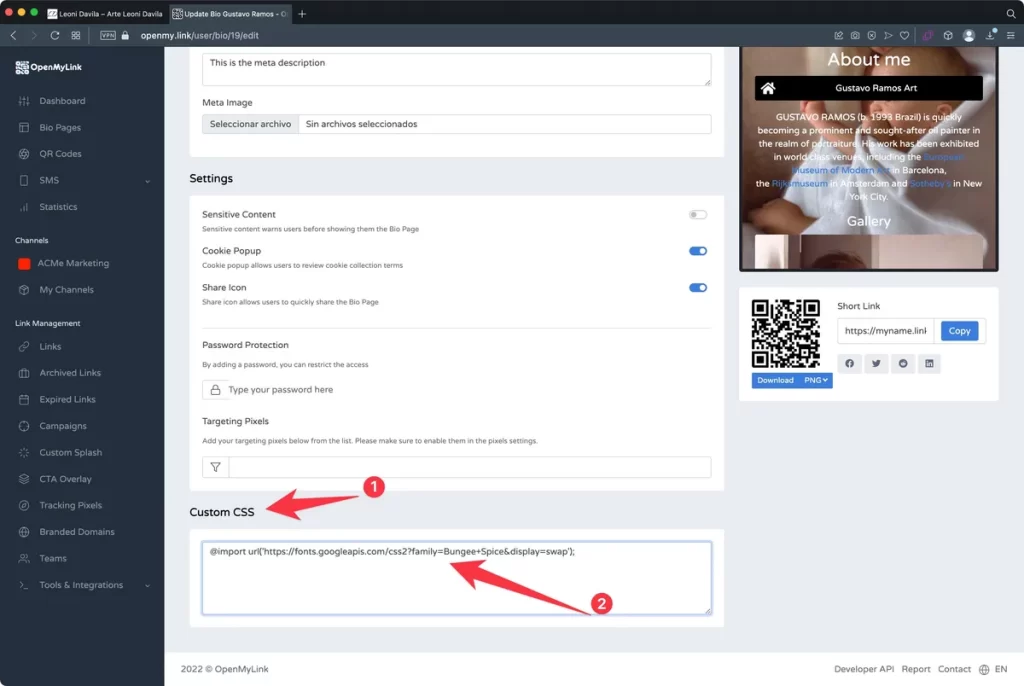
4. We return to the Google fonts screen and select the provided CSS code so we can also include it in our Custom CSS box.
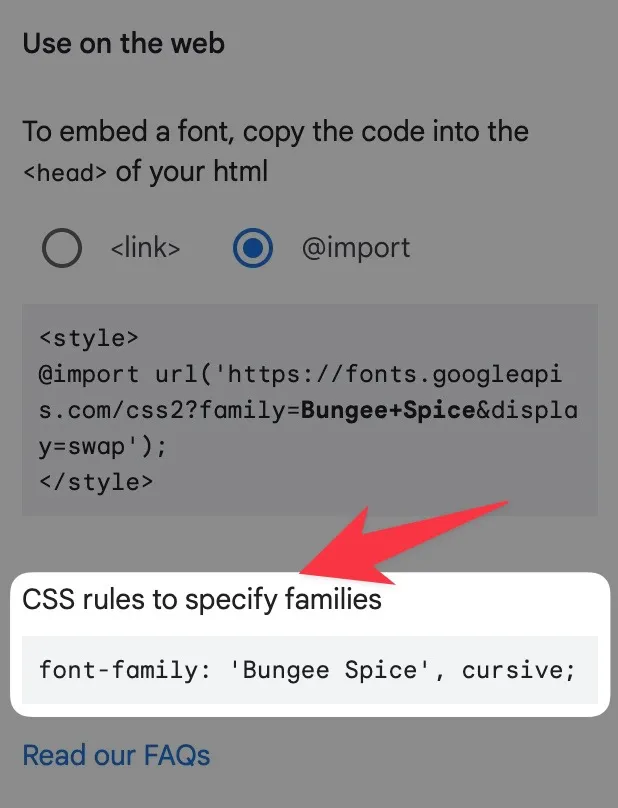
As show in the image, we will need this code, so copy it. We will use it in our next step.
Step 4: Apply font to page
We will now copy the following sample code in the next line of the “Custom CSS” box, so that we can apply the selected font to our Bio Page headings. In your case you would have to replace the “font-family: ‘Bungee Spice’, cursive;” for the code provided by Google.
h1, h2, h3, h4, h5, h6 {
    font-family: 'Bungee Spice', cursive;
}
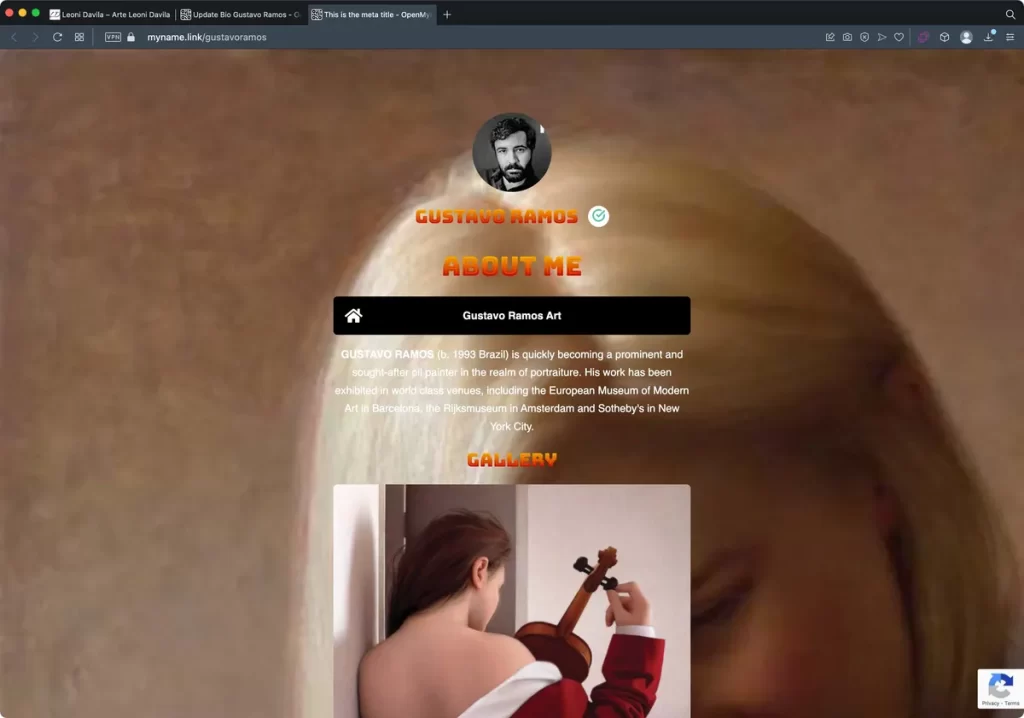
The above code will give us the following result:
Changing body text font
You will need to repeat Steps 1, 2 and 3 using a different font for the Body text. Copy and paste the following code into the Custom CSS box, just bellow the first code you pasted. In this example I’m using the “Nobile” font type.
p, div {
    font-family: 'Nobile', Helvetica, Arial, sans-serif;
}
If you follow all the instructions you would be able to change fonts for heading titles and all texts in the body of your Bio page.
Putting it all together
When we put everything together your Custom CSS box should look something like this:
@import url('https://fonts.googleapis.com/css2?family=Bungee+Spice&display=swap');
@import url('https://fonts.googleapis.com/css2?family=Nobile&display=swap');

h1, h2, h3, h4, h5, h6 {
    font-family: 'Bungee Spice', cursive;
}
p, div {
    font-family: 'Nobile', sans-serif;
}
Alternatively you may merge two fonts in a single instruction:
@import url('https://fonts.googleapis.com/css2?family=Bungee+Spice&family=Nobile&display=swap');So the final code could look like this:
@import url('https://fonts.googleapis.com/css2?family=Bungee+Spice&family=Nobile&display=swap');

h1, h2, h3, h4, h5, h6 {
    font-family: 'Bungee Spice', cursive;
}
p, div {
    font-family: 'Nobile', sans-serif;
}
Extra code snippets
Font size and shadow
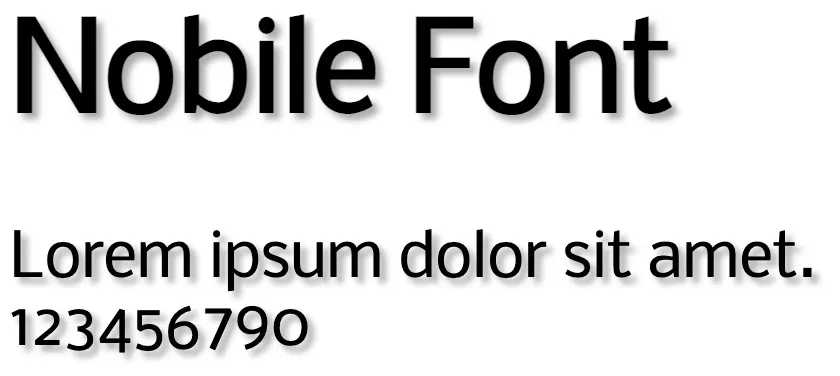
If you want to add some font effect like a shadow and change the font size, you can use the following code:
p, div {
   font-family: 'Nobile', sans-serif;
   font-size: 30px;
   text-shadow: 3px 3px 3px #ababab;
}
The end result will look something like this:
Fonts already available in OpenMyLink
These fonts are already loaded and ready to be used on your biopages, so you don’t need to load them again. Before inserting fonts look at this list to make sure they’re not already available.
You can change the fonts in your “Appearance” tab.
Alegreya+Sans
Arial
BioRhyme
Changa
Coda
Comic+Sans+MS
Cormorant
Courier+New
DM+Sans
Eczar
Fira+Sans
Helvetica+Neue
Impact
Inkut+Antiqua
Inter
Karla
Montserrat
Open+Sans
Pacifico
Poppins
Press+Start+2p
Proza+Libre
Roboto
Source+Sans+Pro
Space+Mono
Syne
Times+New+Roman
Verdana
Work+Sans


